
CART vs. AI Captioning for Live Events: How to Choose the Right One
If you're planning a live event and someone has asked for captions, you've probably run into two options that sound interchangeable but aren't. There's human CART captioning, and there's AI captioning. Plenty of articles online will tell you one of them is always better. The real answer is that it depends on your event, and choosing well can save you money on some sessions while saving you from a very public headache on others.
We provide both at Talon AV. Here's how we actually help clients decide.
What the two options really are
CART stands for Communication Access Realtime Translation. A trained, certified human captioner, either a stenographer or a voice writer, listens to your event and produces verbatim captions in real time, often at hundreds of words per minute. Stenography is a skilled profession, and a good captioner does more than transcribe sound. They handle context, jargon, crosstalk, and accents the way a human listener does.
AI captioning uses Automatic Speech Recognition, or ASR. It's the same family of technology behind your phone's dictation. Captions appear automatically from the audio, with no human in the loop. In some platforms it's quite literally a switch you flip on.
Both are useful. They just have different strengths.
The honest tradeoffs
Accuracy. This is where the real difference lives. A skilled CART captioner reliably delivers very high accuracy, even when the room is noisy, speakers overlap, or the content is full of technical, medical, or legal terminology. ASR has come a long way, but it still struggles with exactly those conditions: heavy jargon, strong accents, multiple speakers, bad audio. For a casual internal meeting, that's fine. For a keynote in front of a thousand people, a caption feed full of errors becomes its own kind of failure.
Cost. ASR is meaningfully cheaper, and for high-volume situations, like a dozen simultaneous breakout rooms over several days, the math often favors it. CART captioners are skilled professionals, and their time is priced that way. Where people get into trouble is treating cost as the only number that matters. The better question is what an inaccurate caption actually costs you on a given session.
Preparation. Both get better with prep, and this is where a lot of caption projects succeed or fall apart. Human captioners do their best work when they get speaker names, agendas, and industry terminology ahead of time, and they do even better when they can sit in on a rehearsal to get used to the speakers' cadence and accents. ASR systems can be tuned too. You can pre-load key terms and names to improve recognition. Either way, good captions are not a flip-the-switch-day-of accommodation.
Risk and the room. ASR runs on the audio it's given. Bad audio means bad captions, full stop. A human captioner can adapt mid-sentence to a surprise speaker change or an audience Q&A. A machine can't anticipate. On a high-stakes event, that adaptability is a big part of what you're paying for.
A simple way to decide
Match the method to the stakes of each session.
Human CART is usually the right call for high-profile, public-facing, or executive sessions like a keynote, a commencement, or a board meeting. It's also the right call when the content is dense with specialized terminology, when you have a formal accommodation request or a compliance requirement, or when multiple speakers and live Q&A make the audio unpredictable.
AI captioning is a reasonable fit for internal, informal, or low-stakes sessions. It works for high-volume content, like many breakout rooms over many days, where putting a human captioner in every room isn't realistic. And it makes sense when budget is genuinely the binding constraint and some captions are far better than none.
Here's the part most of the "always pick a human" articles leave out. You don't have to choose one for the whole event. You can put a human CART captioner on the general session and your highest-stakes content, and run well-prepared ASR across the breakouts. That's exactly what we did for Children's Miracle Network's Hospital Week: human CART in the general session, including the live musical performance, ASR support across the breakouts, and a full accessibility review afterward. The client got the accuracy where it mattered most and sensible economics everywhere else.
Getting captions onto the screen is its own job
One thing worth flagging, because it catches people off guard. Picking CART or ASR is only half the work. Getting those captions to show up accurately and in sync, on the in-room screens and on your live stream, takes dedicated systems and technical expertise. Broadcast-standard closed captions, CEA-608 and 708, in-room caption displays, captions burned into a stream, captions on a second-screen link, those are all different technical paths. The captioning method is the what. The caption delivery system is the how. A great captioner feeding into a broken display doesn't help anyone.
How we help
At Talon AV, we treat captioning as a production value, not an afterthought. We'll tell you honestly which method fits each part of your event, help you collect and organize prep materials for your captioning team, design the caption display and delivery systems for both in-room and streamed audiences, and build in the redundancy that keeps captions running when something goes sideways. We do this for our own clients, and as a specialty partner for other production and AV companies.
If you're weighing captions for an upcoming event, or you just want a second opinion on what your event actually needs, reach out for a consultation. And if you want the deeper technical picture, our Event Accessibility services page gets into CART, ASR, sign language interpretation, audio description, and assistive listening.

Talon Tech Tip: The Basics of a Public Address System
I recently received a message from a long-time client asking for help understanding how to amplify voices at a socially-distanced, outdoor event. They knew they because their very small audience was all separated from each other and from the presenters that they needed microphones for their event, but were unsure how all the pieces worked together. This article came out of offering one client some basic help understanding how the pieces of an event sound system (often called a “Public Address” or “PA” system) fit together.
In general the basic components of a public address system are the microphone(s), the mixer, the amplifier, and the speakers. Sometimes one or more of these components are combined in all-in-one units.
NOTE: Much of my writing published here has taken a broad look at the industry and with a fairly philosophical tone. Other posts have been super geeky and designed for industry technical peers. This one is a very basic intro to an AV topic. If you have much experience in the technical side of production, you probably already know this, but if you’re less confident in your understanding of audio technology, or are just getting started in the events industry, you might check it out. I break down the very basic building blocks of a Public Address system. If it’s not your jam, feel free to gloss over. Even if this isn’t your cup of tea, I hope you’ll come back to see my future writings - I’ll be jumping between tech-heavy and more general postings.
The Basics of a Public Address System
I recently received a message from a long-time client asking for help understanding how to amplify voices at a socially-distanced, outdoor event. They knew they because their very small audience was all separated from each other and from the presenters that they needed microphones for their event, but were unsure how all the pieces worked together. This article came out of offering one client some basic help understanding how the pieces of an event sound system (often called a “Public Address” or “PA” system) fit together.
In general the basic components of a public address system are the microphone(s), the mixer, the amplifier, and the speakers. Sometimes one or more of these components are combined in all-in-one units.
Microphones
In terms of microphones, a very common live sound microphone (in fact probably the most popular / famous mic in the world) is the Shure SM58. A microphone is a transducer that takes the physical sounds of your voice (or a musical instrument) and turns it into electrical energy, which is carried over a wire to the rest of the system.
Wireless microphones have two more parts - the transmitter, and the receiver. The transmitter has the microphone element attached to it, and that picks up the sound from the person speaking, and the transmitter converts the electrical energy from the mic element into radio waves. The receiver turns those radio waves back into an electrical signal that connects to your mixer. You can think of a wireless microphone transmitter as a tiny radio station, to which the receiver is “listening.”
Wireless microphone transmitters typically come in either a Hand-Held form factor, which can be held or placed into a stand, or a “Body Pack” form factor that is designed to be clipped to the belt and used with a lapel microphone or a headset microphone.
Because wireless microphones use radio frequency to transmit sound, they offer different "channels" which adjust the frequency each mic is using. The transmitter and the receiver need to be on the same channel to work, just like you have to have your car radio on the correct frequency to hear your favorite FM station. If another microphone, or a local TV station, or a walkie talkie, or any other device uses an overlapping frequency, the mic will get radio interference, causing dropouts or unpleasant noises. There is a whole science to frequency coordination, but a great start is to use the “scan frequencies” function on your microphone system to find available channels in your area.
Many new wireless microphones use digital encoding to provide high-quality audio over minimal radio bandwidth, but the basic principles above still apply.
Mixers
The next component of the sound system is the mixer. Mixers take multiple audio signals and “mix” them together, allowing the operator to change the relative volumes of the inputs and adjust aspects of the sound from each one.
Mixers can come with as few as 2 up to 70+ inputs, and come in various feature sets. To use 4 microphones with one PA you would need a mixer with 4 microphone inputs, and to mix an arena rock concert, you probably need a much bigger mixer.
Small, low channel-count mixers are usually analog devices that manipulate the sound with physical electronic components. Larger, higher-channel count mixers are often digital, encoding the audio into a digital signal and using digital signal processing to manipulate and mix the signals. This approach gives a great deal of control over the audio when working with complex systems.
Amplifier and Speakers
The mixer connects to the amplifier, which raises the amplitude of the audio signal high enough to physically move the speaker drivers, and then to the speakers, which are transducers that physically reproduce the electrical signals as sound waves.
Some mixers have built in amps (amplified or “powered” mixers) and some speakers have built in amplifiers (“active” or “powered” speakers). Depending on the configuration, you may be able to connect your mixer directly to your speakers, because the amplifier is built into one or the other.
NOTE: You should not cannot connect the output of an amplifier or amplified mixer to the input of a powered or active speaker - make sure you are connecting the appropriate kind of equipment.
There are also many all-in-one PA systems, some with batteries, that have built in wireless mics, mixers, and amplifiers. These are super useful for small events and events in unique or challenging locations that may not have available electrical power. Note that most will only work with a limited number of inputs and may have somewhat limited output power due to the limitations of the battery.
Connecting it All Together
Once you have all the components, you can connect them together. You will use several different kinds of cables to connect your system together. Make sure components are all connected while they are powered off, and then when you power them on, turn them on in the direction of signal flow. That is, Sources, then Mixer, then Amps. When powering down, turn off the power in the opposite order - Amps, then Mixer, then Sources. This helps avoid unwanted pops and noises that can occur during power up and down.
For most events, your AV provider will be using a fairly complex sound and video system, with multiple types of speakers, electronic mixing and routing controls and several trained operators, but even the biggest audio rigs for arena rock tours are combinations of these basic parts.
So now you have the basics of a PA system.
Tim Kerbavaz (he/him) is the founder and Technical Director of Talon Entertainment Audio Visual as well as a freelance Technical Producer with over a decade in corporate event production after an early career in live music production management. As both a live event technology professional and a creative geek, Tim serves as an event technology sherpa, guiding clients through production and technology decision making and delivering events to production bliss.
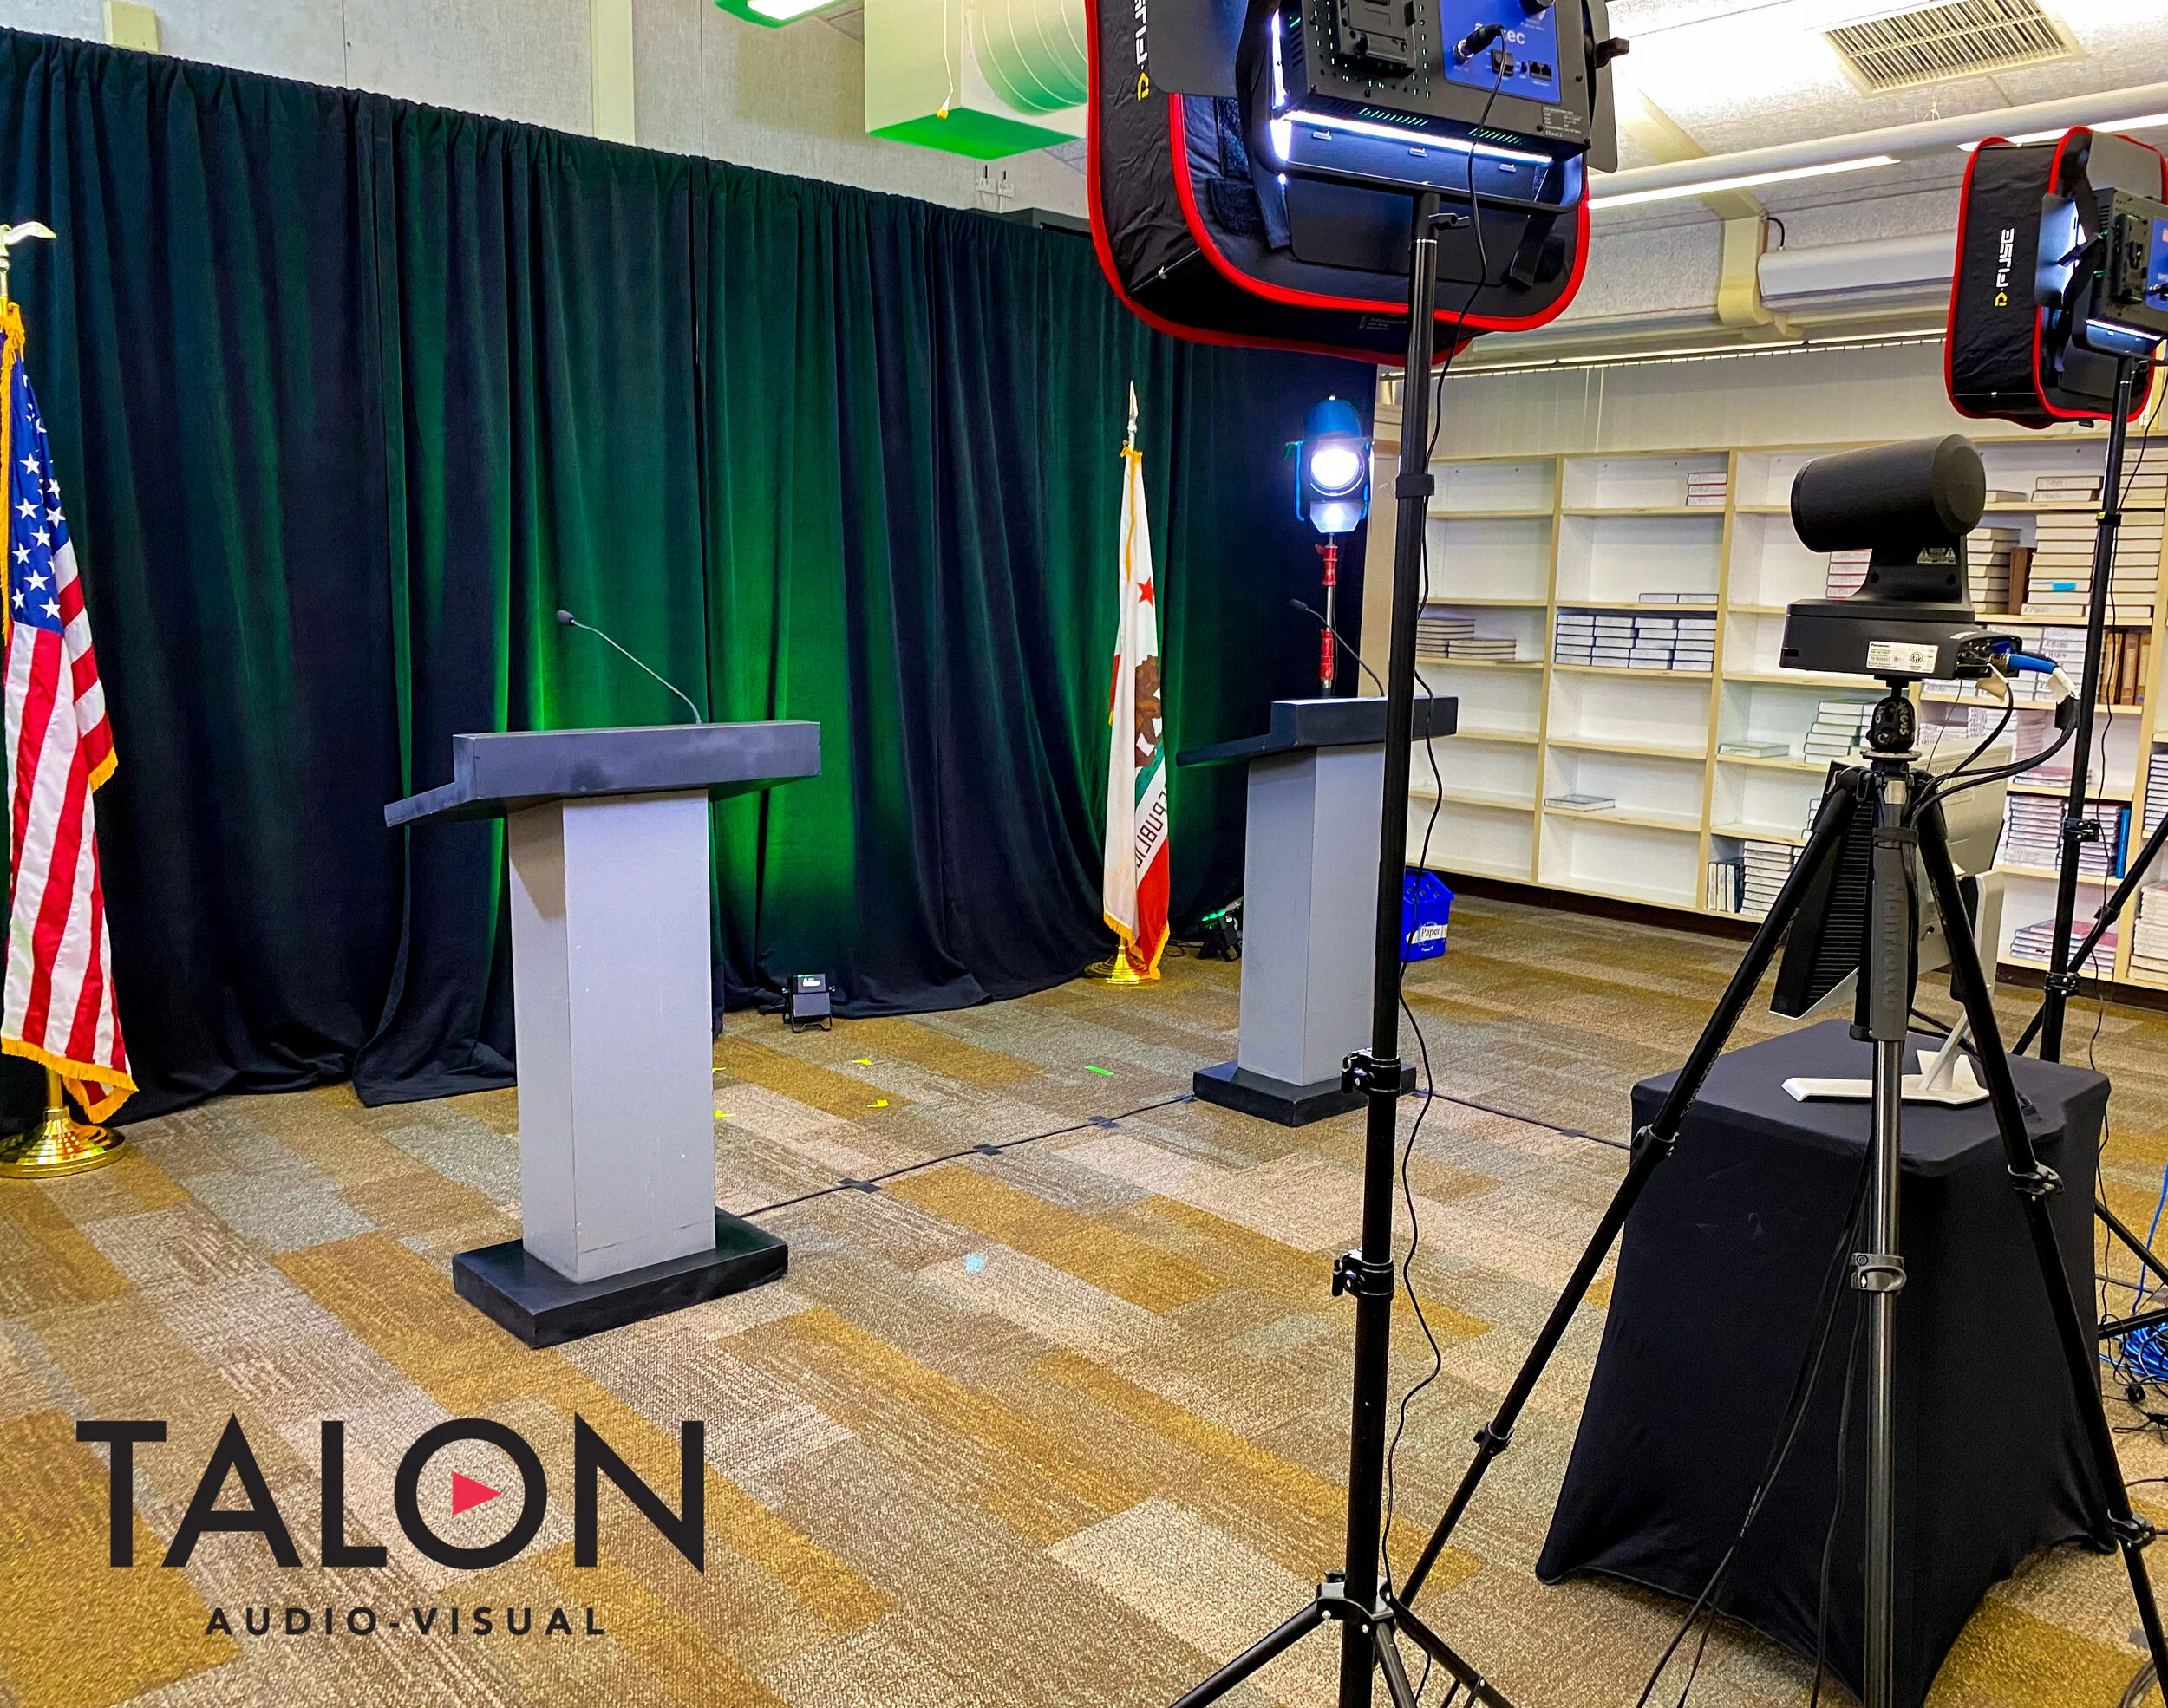
Presenting the Class of 2020 (Virtually)
I got a phone call in March from a long-time-client - can you make our graduation virtual?
When Da Vinci approached me to reimagine their graduation as an online event, I knew their event needed more than a pre-recorded video or a teleconference link. Working with school administrators and district officials, we got permission to build a studio in a classroom and broadcast their event live from the high school campus. Over June 10th and 11th, we transformed the media classroom into a studio with pipe and drape, lighting, a few lecterns, two vans full of video equipment, and 4 technicians: Technical Director, Graphics Operator, Robo Camera Operator, and Producer/Show Caller, all all positioned to preserve safe social distancing.
I got a phone call in March from a long-time-client - can you make our graduation virtual?
Talon has been producing the live, in-person graduations for Da Vinci Charter Academy for a number of years, and they, like schools all over the world, were struggling to conceive of what a virtual graduation would look like. Da Vinci is a small charter school that emphasizes values of inclusivity, diversity, and student-driven collaboration. Their graduation ceremony features student MCs, awards, and each student’s “15 seconds of fame” - a 15 second video made by the graduate about their time at the high school, followed by live remarks about each student by a teacher whose classes they took.
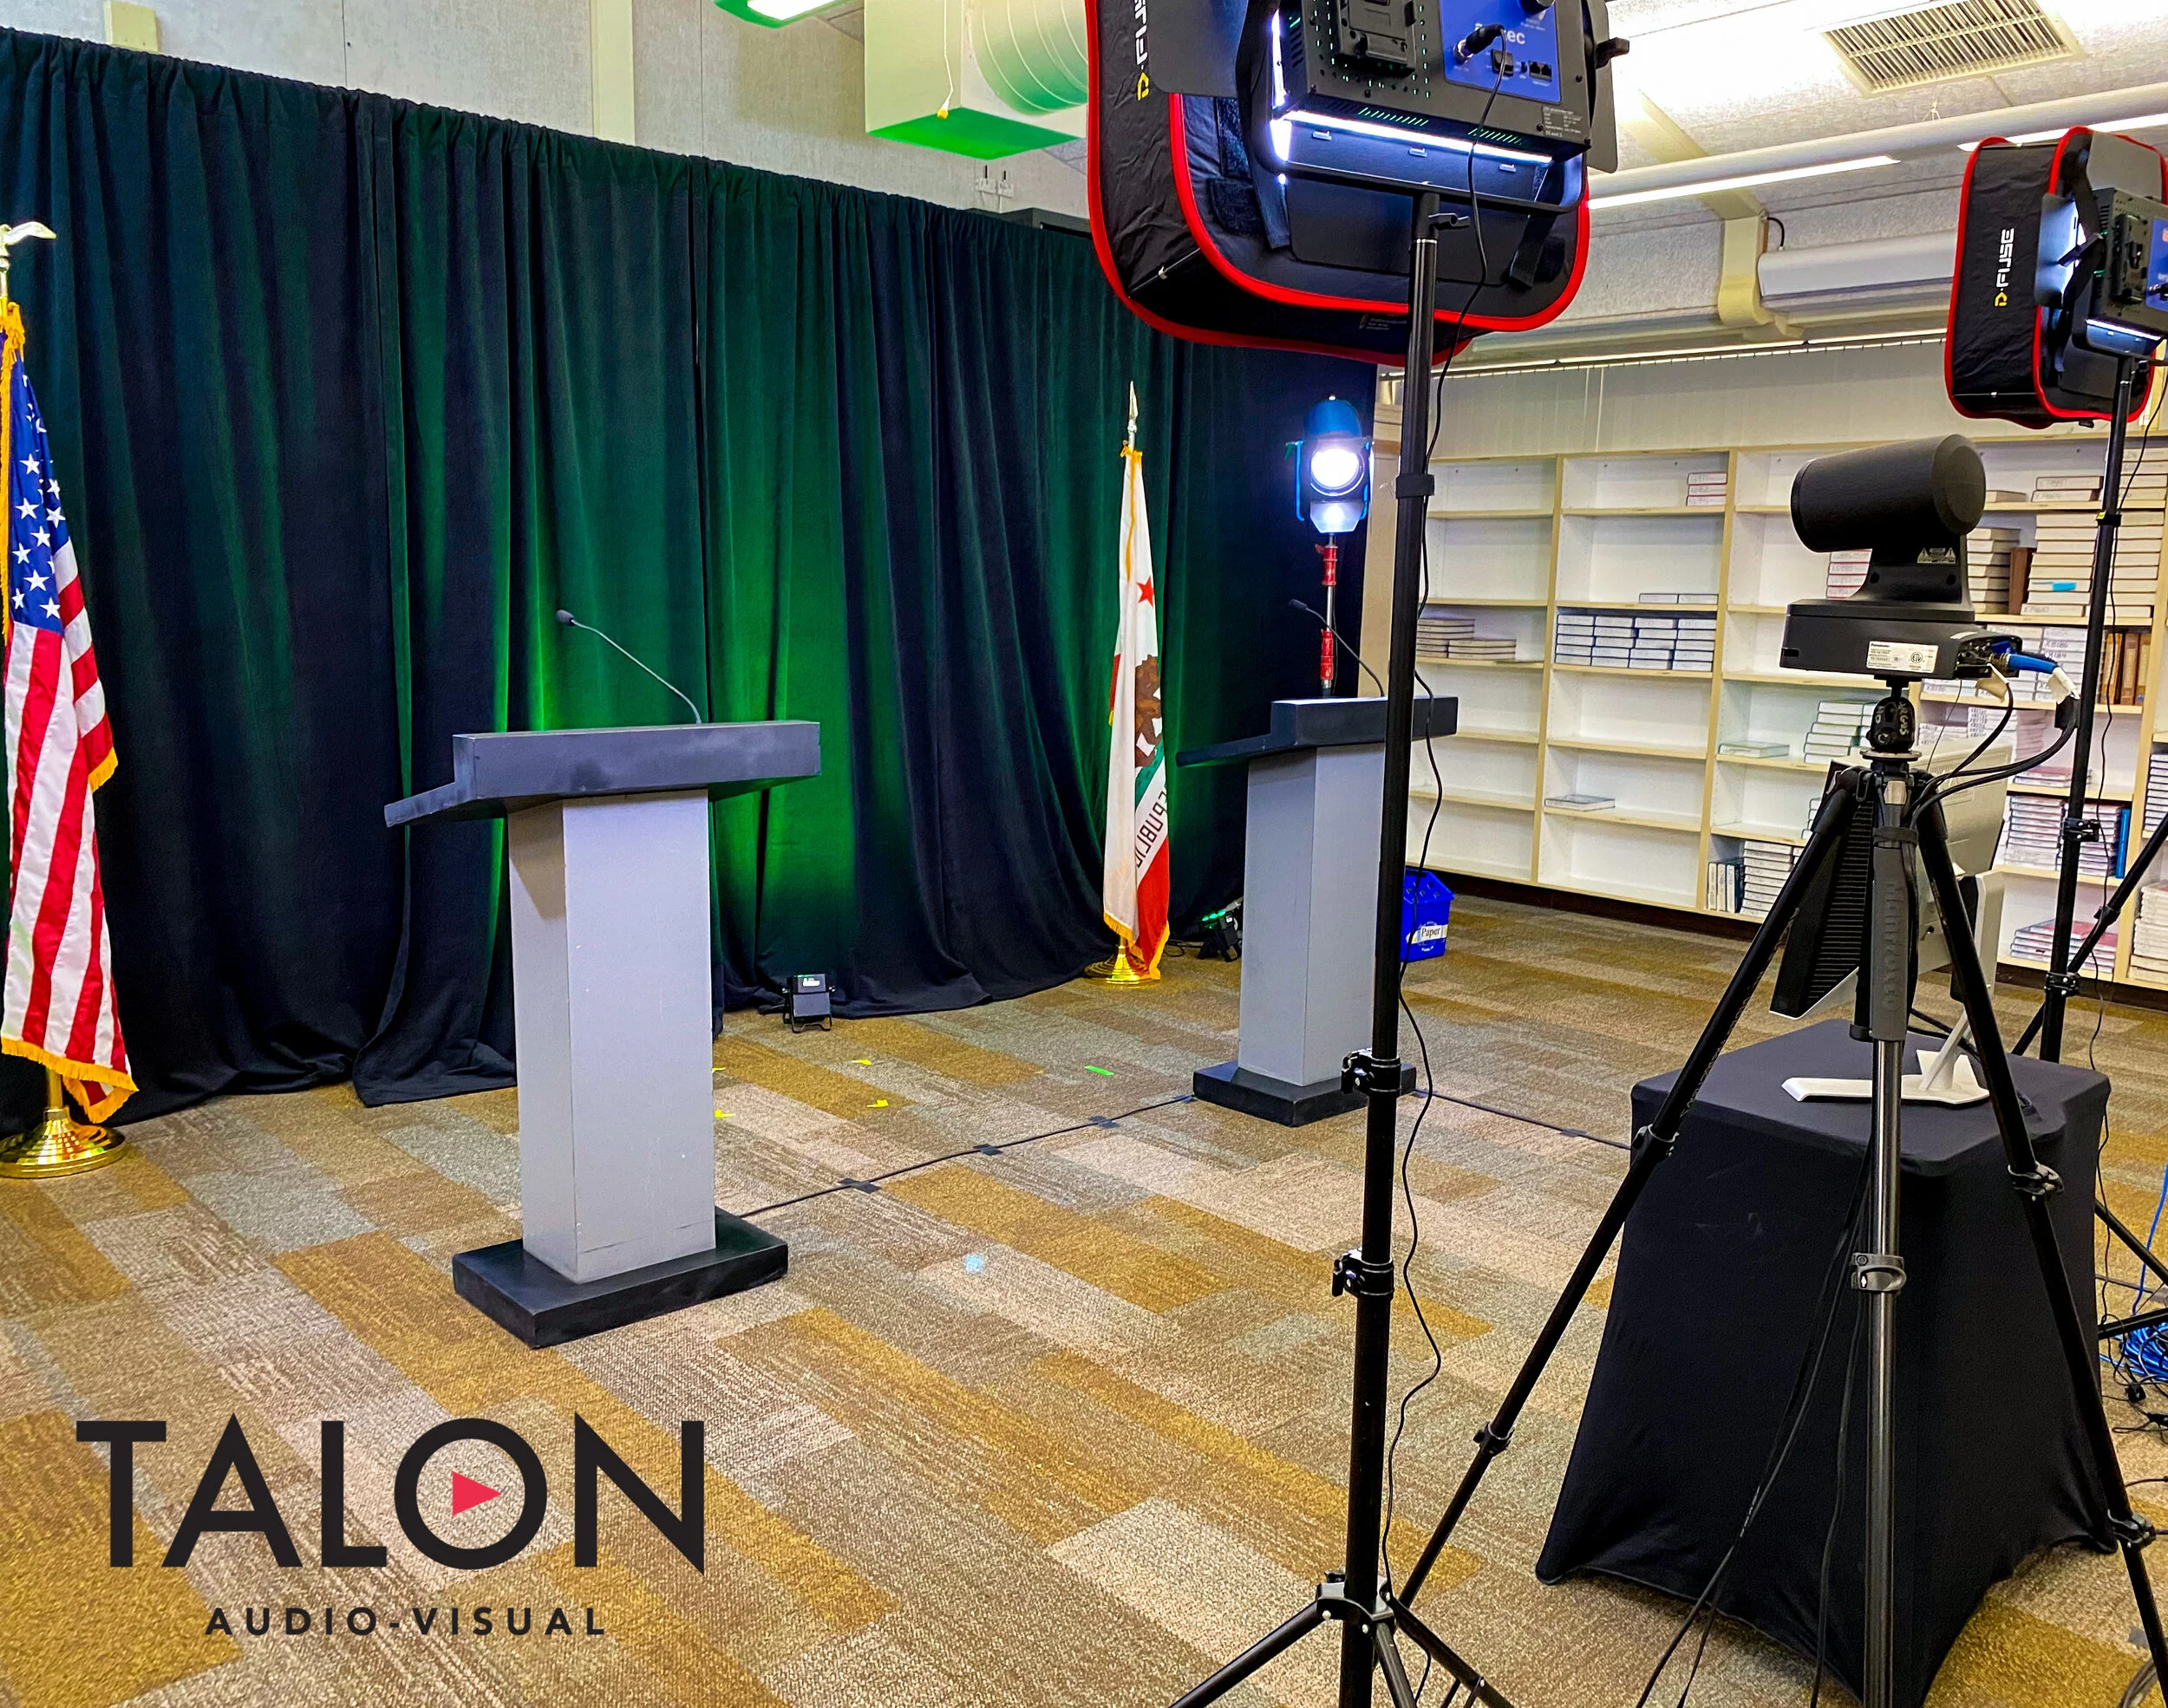
The set, with Pipe & Drape Backdrop, Socially Distant Lecterns, robo cams, and lights visible.
When Da Vinci approached me to reimagine their graduation as an online event, I knew their event needed more than a pre-recorded video or a teleconference link. Working with school administrators and district officials, we got permission to build a studio in a classroom and broadcast their event live from the high school campus. Over June 10th and 11th, we transformed the media classroom into a studio with pipe and drape, lighting, a few lecterns, two vans full of video equipment, and 4 technicians: Technical Director, Graphics Operator, Robo Camera Operator, and Producer/Show Caller, all all positioned to preserve safe social distancing.
The resulting production was a live multi-camera broadcast with both student-produced and Talon-created assets. The show opened with a live to camera gag between the principal and vice principal at socially-distant (6’ apart) lecterns, followed by a student-produced video featuring the Student MCs, a capstone video, and childhood photos of the graduates. Talon provided formatting guidance and stock music sourcing, but it was student-created from start to finish. The goal of this segment was to feature the work, talents, and creativity of the graduating class and to allow the student team to honor their classmates. The student video then led into Talon-produced live segments including an awards ceremony, and the giving of diplomas, which honored each student by showing their 15 seconds of fame video and then displaying their name and graduation photo in a Picture-In-Picture format while a teacher spoke about their time at the school.
To produce the graduate graphics, speaker lower thirds, and award graphics, the Talon graphics team used an automatic form-fill process that linked a folder of images provided by the school administration with a spreadsheet of student names, awards, and speaker titles. This allowed for last-minute changes, and made onsite script changes easy to accommodate.
We used school-provided internet access, getting approval and dedicated network connectivity for our equipment and permission to bypass school network restrictions and firewalls. We also provided a cellular network backup, so that we could keep streaming even if the network were to fail.

Monitoring the livestream while calling cues, with video village and the set visible beyond the computer monitor.
Live chat, moderated by the technology teacher at the school, provided a way for students and families to interact in real time, and cheer each other on.
Post-event, the video was made available to parents to watch online and to download as a keepsake.
The event went very smoothly, and we were able to accommodate onsite and mid-show changes easily. We had some last-minute content changes during rehearsal that were easily accommodated by the graphics workflow. The biggest lessons learned for me were twofold - allowing ample pre production time and a full day of setup allowed us to adequately prepare equipment and content, and using a flexible, adaptable graphics workflow allowed us to make onsite changes to graphics, graduate photos, and lower thirds without the need to re-render or individually edit assets.
It was an honor to help DaVinci Charter Academy conceive and execute a socially distant program to honor the hard work and dedication of their students and families. With a great team and flexible systems we were able to roll with last-minute and during-show changes, broadcast live to a remote audience, and provide families with a memento when they couldn’t come to an in-person celebration. Special thanks to our friends at Argus HD who provided equipment and staffing support and to DaVinci Charter Academy and the Davis Joint Unified School District for trusting us to produce their event.
Recording of Da Vinci High Graduation 2020

Author Tim Kerbavaz, in mask, pausing for a selfie between cues while producing the graduation.
Tim Kerbavaz is the Technical Director of Talon Entertainment Audio Visual.
Talon Entertainment Audio Visual provides event AV production services for private, corporate, and community events across the United States. Serving a wide range of events, from political round-tables, to Silicon Valley Tech Company Conferences, to community festivals, to automotive-industry board meetings, Talon AV provides expertise and an exemplary attendee experience.

Death by Dongles
If you give presentations regularly, chances are you’ve had a video adapter mishap more than once.
Perhaps you worry as you head to a new venue: Does the room have the right video connection for my laptop? With so many devices and so many competing connection standards, can you be sure you’re prepared and have the correct adapter before you present?
Here are a few suggestions for making sure you have the correct adapter for the job and some ideas for organizing your adapters.
Managing Video Adapter Woes
If you give presentations regularly, chances are you’ve had a video adapter mishap more than once.
Perhaps you worry as you head to a new venue: Does the room have the right video connection for my laptop? How many dongles do I really need to carry around to give my presentation?
With so many devices and so many competing connection standards, can you be sure you’re prepared and have the correct adapter before you present?
We support lots of presentations here at Talon Entertainment Audio Visual, and we have amassed a pretty large collection of video adapters. Here are a few suggestions for making sure you have the correct adapter for the job at every event, as well as some ideas for organizing your adapters, no matter how large your collection may be.
What adapters do I need?
If your computer has both HDMI and VGA built in, you probably don’t need to carry any adapters, as you’ll pretty much find one or both at any venue you visit. That said, most new macs and many smaller PC laptops, ultrabooks and tablets will need an adapter - they use smaller connectors to save space. You’ll encounter USB-C and Mini DisplayPort the most these days (USB-C has become a fairly common standard, certainly by 2019 we’ve been seeing it on a broad swath of computers) but we still see Mini DisplayPort, Full Size DisplayPort, and Mini and Micro HDMI a fair bit.
If your computer has built-in HDMI, you might consider adding an HDMI-to-VGA adapter to your laptop bag. I know it seems VGA is on its last legs, but we still encounter it a lot, particularly in smaller conference breakouts or older venues. We’ve had good luck with this one from Cable Matters, which has an audio output and the ability to get power over USB if your HDMI port doesn’t supply enough power. Hopefully as 2020 approaches we’ll see VGA less and less, but we always have a couple of VGA adapters, because it shows up.
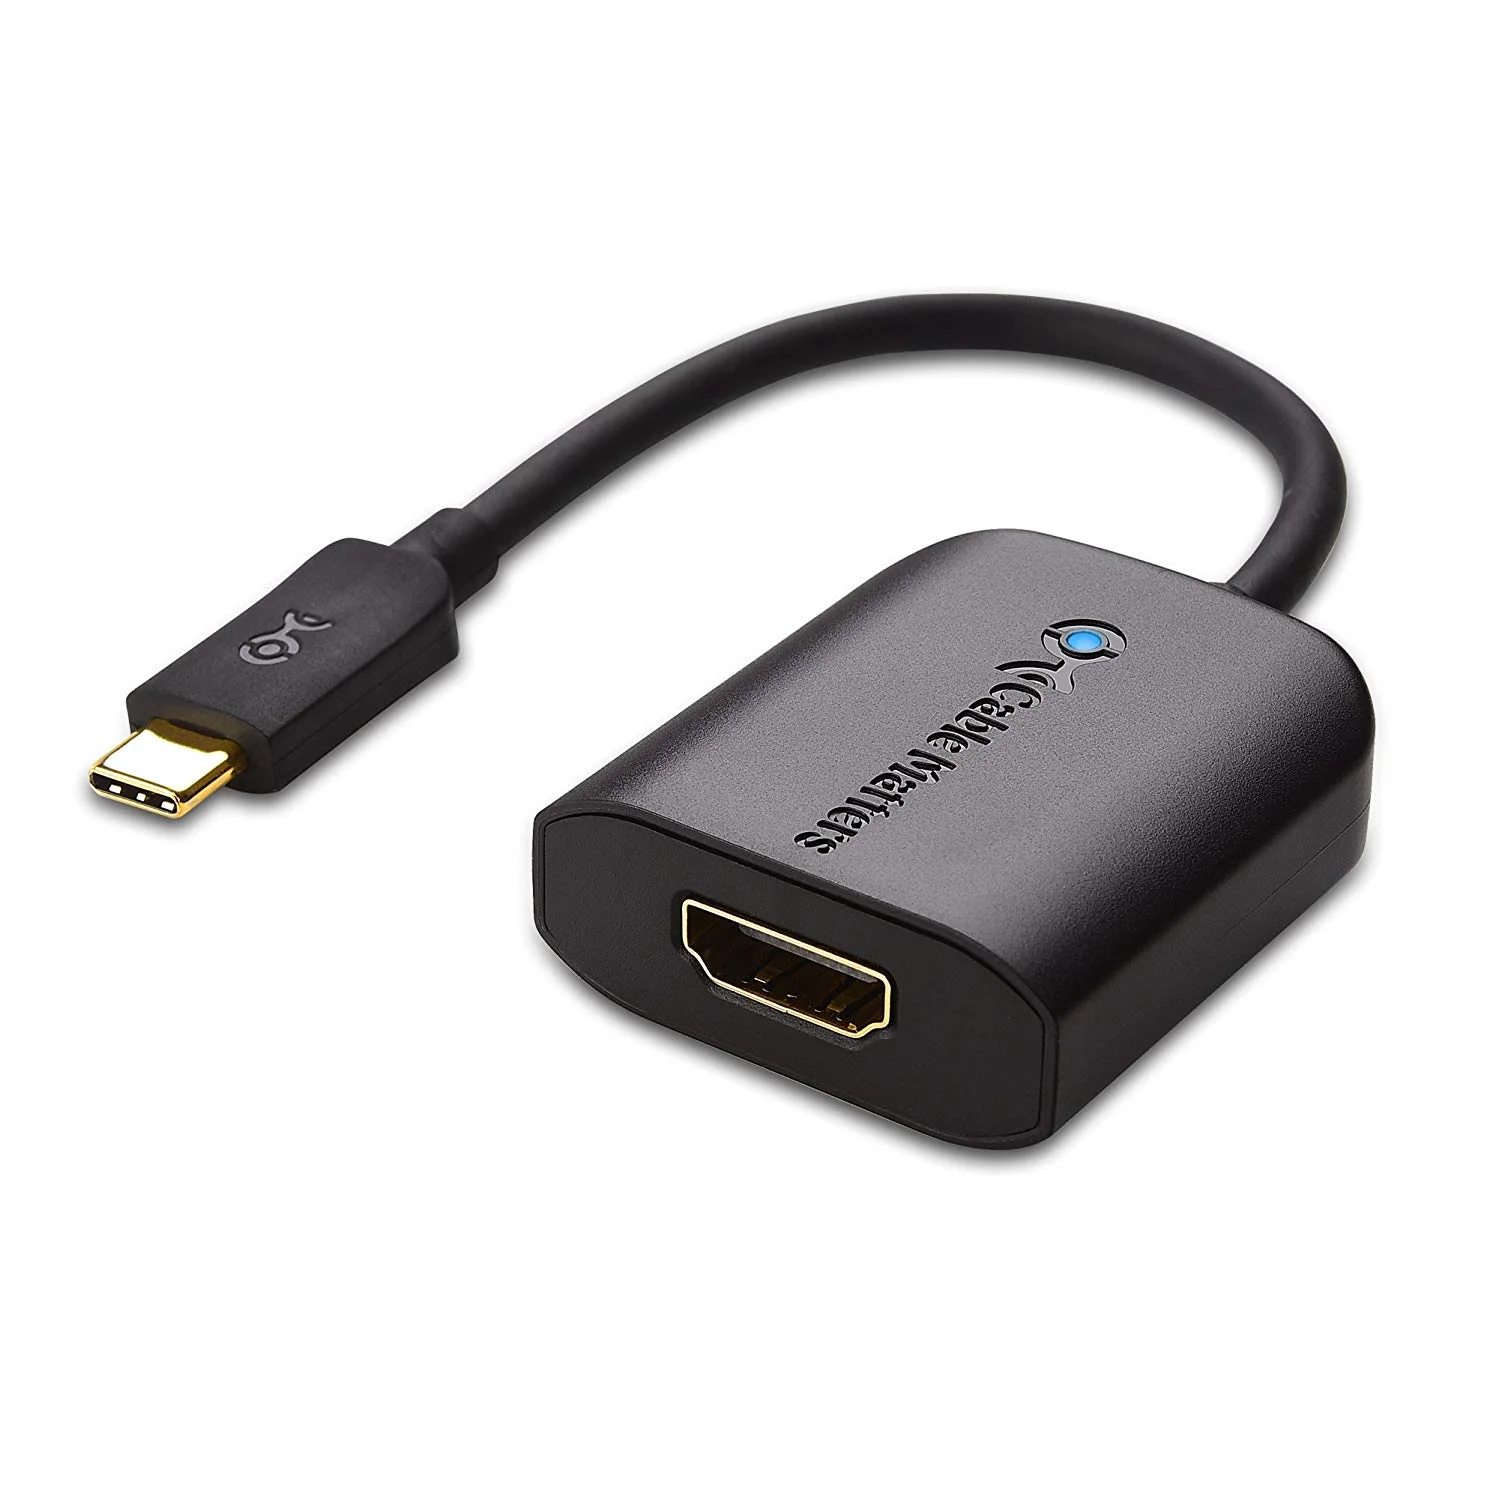
USB-C to HDMI Adapter
Many new laptops have USB-C. Make sure when you buy an adapter that it supports your specific computer make and model. Different hardware makers implement the standard slightly differently (The same connector can be used for USB, Thunderbolt, and DisplayPort signals, so you have to make sure your computer and the adapter can communicate in the same language.) I’ve had good luck with this model for VGA and this model for HDMI.
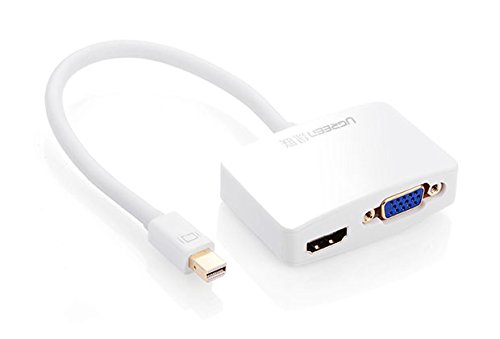
Mini Display Port Combination Adapter - VGA and HDMI
If you have Mini Display Port on your computer, you probably want to get adapters to both HDMI and VGA. Some manufacturers make combo adapters that have both HDMI and VGA out. Keep in mind that you can only use one of the outputs at a time (either VGA or HDMI but not both at once), but it still saves carrying two separate adapters - I like this one, and have carried it with my 13” Macbook Pro for a few years.

HDMI Connector Types
If you have an ultrabook or tablet, you might have Mini HDMI or Micro HDMI. If you have those, make sure you carry an adapter - these are not super common and venues might not have the correct adapter on site.
For Mini or Micro HDMI connectors, you can get an adapter that has a short cable between the Mini HDMI and the full-sized HDMI ports, like this for Mini HDMI and this for Micro HDMI, or you can get a one-piece adapter like this. Either way, be very careful that the HDMI cable and adapter combination are supported from below—do not put strain on you computer or tablet’s Mini or Micro HDMI port—these connections are very delicate, and you don’t want to damage your device with a heavy cable pulling on the port
Where do I keep my adapters?
At Talon AV, we have so many adapters that we keep them in a large clear tackle box, but likely you don’t need to carry that many on a daily basis.
For a daily carry, I like to use zipper bank deposit bags like this. They are small enough to fit easily in a laptop bag or backpack, but easily hold several video adapters, USB Cables, and a phone charger or two. I carry one in my backpack with all my most-used accessories so that I’m always prepared.
Do you have other ideas for using or storing video adapters? Let us know!
Microphone Tips from the Pros
“Is this thing on?”
I can’t count how many times I’ve heard someone announce this uncertainty into a live microphone to a room full of attentive listeners.
Microphones: Using one should be simple, but event attendees and presenters are often confused when you hand them a mic. Where do I hold it? Where do I set it down? And the eternal question, "IS THIS THING ON?!"
Hopefully this blog post will help clear up some basic misconceptions about microphones, and help make you a microphone pro.

Are you confident about using microphones at your events? Here are some microphone tips from the pros.
“Is this thing on?”
I can’t count how many times I’ve heard someone announce this uncertainty into a live microphone to a room full of attentive listeners.
Microphones: Using one should be simple, but event attendees and presenters are often confused when you hand them a mic. Where do I hold it? Where do I set it down? And the eternal question, "IS THIS THING ON?!"
Hopefully this blog post will help clear up some basic misconceptions about microphones, and help make you a microphone pro.
How Do I Hold a Microphone?
Hand Held Microphone
Hold the microphone in front of you, pointed at your mouth, about 3-5 inches from your face, and about an inch below your mouth. You want to talk into the microphone, so it can pick up your voice loud and clear, but you don’t want to breathe directly into the mic to avoid heavy breathing and the annoying plosives - the popping sound when you say “P” and “B” sounds with a puff of air. We’ll cover those pesky on-off switches a bit later.
Gooseneck Microphone - Lectern or Panel Discussion
Again, make sure the mic is about 3-5 inches away and about an inch below your mouth. Try not to turn your head too far away from the mic as you reference your slides or look around the room - you still need the mic to pick up your voice to be heard by your audience. Don’t talk too far away from the mic, but also don’t talk right on top of the mic. If you’re up too close to the mic, you may hear distortion and clipping from the mic being overpowered by your voice, especially on plosive sounds. If you hear distortion, back off the mic a bit.
Lavalier Microphone
If you’re using a lavalier microphone (the kind that clips onto your shirt), make sure it’s high up and centered on your chest, so that it picks up your voice over the room noise. You want to make sure that it can still hear your voice if you turn your head and that you won’t suddenly change volume as you move. If you wear it on one side, put it on the side you’ll turn towards to face the screen.
Headset Microphone
If you’re using a headset or an “earset” (a headset that clips to only one ear), make sure you position the mic element so that it’s just off to the side of your mouth, so that you don’t get breath noise or plosives, but still close enough to hear you well. Make sure the headset or earset is securely attached to your head, and, if appropriate, clip or tape the cable to your shirt so that it doesn’t pull on the mic.
With any wireless body-worn mic, make sure you clip the mic transmitter pack (called a “belt pack” or a “body pack”) to your belt or put it in a pocket, taking care not to pull on or put strain on the microphone cable.
What is that awful squealing noise?
Feedback - we’ve all been to a meeting where the microphone squeals and screams, making the whole room cover their ears and wince.
Feedback occurs when the microphone picks up the sound from the speakers more than the sound of the person speaking. This can occur because the mic volume is too high, because the person with the mic walks in front of the speakers, or because the microphone is being held in such a way that it picks up too much room noise.
The basic rules are these:
Don’t point the mic at the speakers.
Make sure the person speaking is louder to the mic than the amplified signal.
Don’t cover the mic with your hand.
That last rule is a bit counter-intuitive - you would think that covering the mic would make the feedback go away, but in fact it can make feedback worse. Most microphones used at events are directional - they pick up sound in front of them, and reject sound in back of them. If you put your hand over the top of the mic, or cover part of the windscreen “rapper-style,” you can turn a directional mic into an ominidirectional mic - one that picks up sound from any direction. This is a great way to make feedback happen; unless you want feedback, don’t cover the mic.
If you need to make a comment off-mic or walk in front of a speaker, mute your mic instead of covering it.
On/Off
Wireless Mics
All wireless microphones have a switch of some kind, but every brand of mic is different, so the mics at your event may have a slightly different interface. But no matter the brand, there will be a switch labeled “Power” or “On/Off”. If it’s a toggle switch, flick it on. If it’s a push button, press and hold for about 3 seconds until the screen and lights turn on.
Most mics take between 1 and 3 seconds to power on, so turn the unit on, and wait a few seconds before you talk.
On mics with a push button, a long press and hold usually turns the unit on and off. Often, a short press mutes and unmutes the microphone. On these models, the light is often green to indicate “on” and red or amber to indicate “mute”. On models with only one color of light, there is usually a small text indicator on the LCD screen on the mic transmitter to indicate mute status.
If there’s a sound operator in the room, he or she may ask you to leave the mic transmitter on all the time and allow him or her to unmute the mic remotely when you begin your presentation and mute it for you when you come offstage. If you turn off your mic manually, the operator won’t be able to remotely turn it on again, so make sure you leave the transmitter on and unmuted if that’s what the technician asked when they gave you the mic.
Gooseneck Mics
If you’re using a gooseneck mic at a panel discussion or lectern, there may be a push to talk button. Many of these mics are Push-On-Push-Off, meaning you push the button once and let go to turn it on, and push again and let go to turn off after you’re done using the mic. If that’s the case, make sure you turn off your mic after you speak to avoid picking up rustling paper or any side comments you make. Often these mics will have a light on the mic or the base to indicate the mic is on.
If the mic is Push-and-Hold to talk, press the button and keep it pressed as long as you are speaking, then release the button when you’re done talking.
Off to the meeting
I’ve covered the major types of microphones you’ll encounter at events, so with this guide under your belt, you should be ready for your next meeting.
Just remember the basics - the mic has to pick up your voice, and avoid picking up the sound in the room. Avoid plosives and feedback with proper mic placement, and take note of your on-off switches.
Now you’re a microphone pro!
© 2019 Talon Entertainment - All Rights Reserved
Cover image via Depositphotos - Halfpoint